09
2019Demosaic for Tintype or Blue-Spectra Photography
After reading my post on how to recreate the look of tintype and wet-plate collodion digitally, you may have been left wanting the code to appropriately demosaic/debayer.
This is a photography blog, not a coding blog, so please bear with me for my first go at making this accessible.
To recap from my earlier posts:
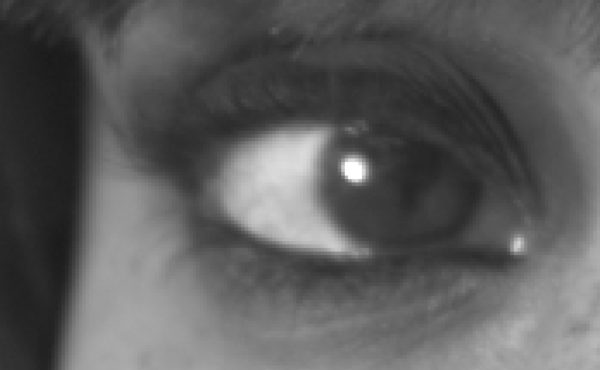
In looking at an image captured through a B25 glass, you will only capture 1 out of every 4 pixels correctly, thanks to the debayer color filter array (CFA) on top of your digital camera’s sensor. That means 3 pixels are “dead” or, at least “incorrect”. Here’s a quick script to throw them out.
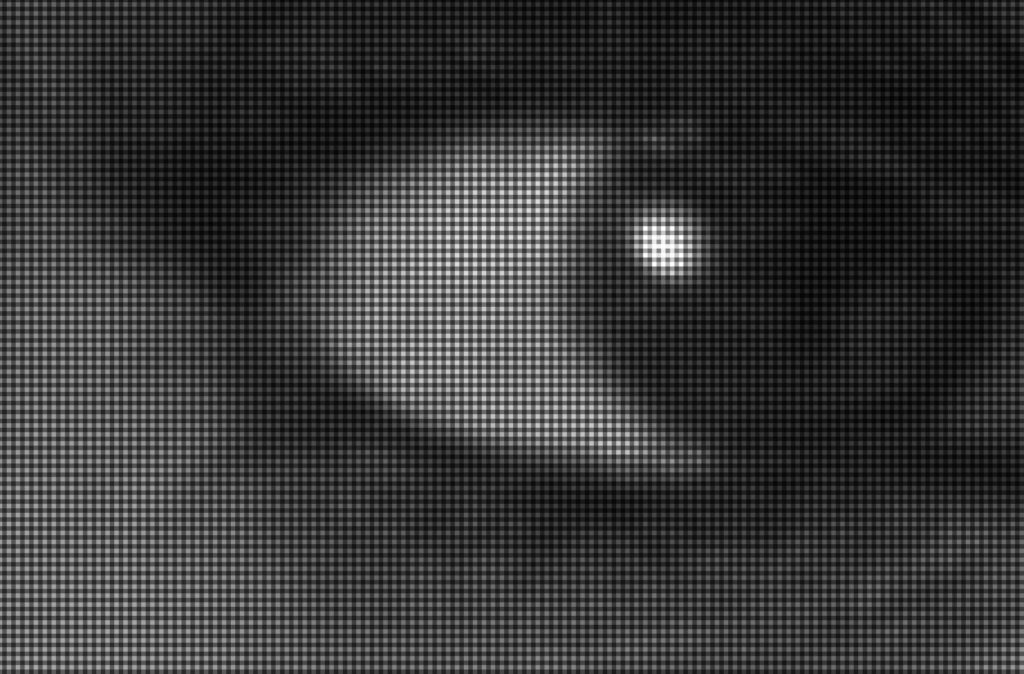
I know I will get some feedback that this is not a debayer, or demosaic, in any traditional sense. You are technically right, haters. This is simply a downsample to strip out the three dead pixels.
You will quarter the resolution of your image with this process. I’m sorry, but it has to happen. The resulting clarity will play nicely with any upscaling processes you then wish to engage upon, however, and, especially in portraiture, artificial intelligence can work wonders.
I originally wrote this in MATLAB, but instead let me give it to you with freeware.
Software Requirements
You will need the following command-line tools. These are free, but if you aren’t comfortable using a command line interface (CLI) then I have bad news for you- this is unfortunately how you’re going to have to do it.
ImageMagick – This is THE tool for altering an image from the command line. It exists for all platforms, so whatever computer you are running, you can use it.
DCRaw – This is THE tool for opening raw files from a digital camera. RawTherapee is a front-end for this tool. Unfortunately, you still will have to install it, even if you have RawTherapee, to use the command-line interface.
I recommend, if you are on a Mac/Linux, simply using homebrew to grab these- open up a terminal window, and type
homebrew install imagemagick
and then
homebrew install dcraw
On PC, this might be a bit more complex, but these tools exist for all platforms, which is why I chose to code in this fashion.
Assuming these are installed correctly, you should be able to run this single line of code to demosaic down to the blue sensor pixel.
The Code
Open a terminal window, navigate to where your RAW file lives, and type:
dcraw -c -D -T -6 -g 2.4 12.92 -o 1 YOURINPUTFILE.(NEF.RAW) | convert - -roll +1+1 -sample 50% YOUROUTPUT.TIF
This tells DCRaw:
(-c) Output in a fashion that can be handed off to ImageMagick (STDOUT for piping)
(-D) Monochromatic, untouched output
(-T) Tiff
(-6) 16 bit
(-g 2.4 12.92) gamma 2.4 with a toe-slope of 12.92, which is, more simply put, the appropriate setting for sRGB.
(-o 1) Set the colorspace to sRGB with a d65 white point. You can tinker with this, but ultimately it shouldn’t make too big of a difference, since we are compressing to a monochromatic pipeline here regardless.
Note that some tutorials will tell you to use a -4. This will output a linear electro-optical transfer function, and unless you really know what you’re doing, you probably don’t want this. I would argue you really don’t want this.
This then pipes ( | )the data to ImageMagick- or rather the utility it provides named “convert”:
(sample 50%) Downsample at 2:1, implied that you are dropping every other pixel in both X and Y directions
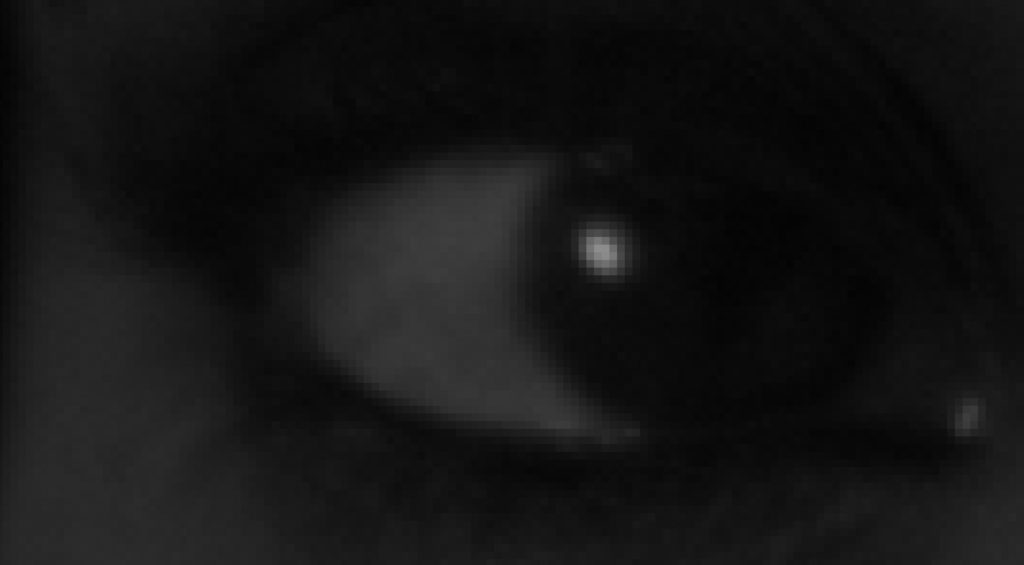
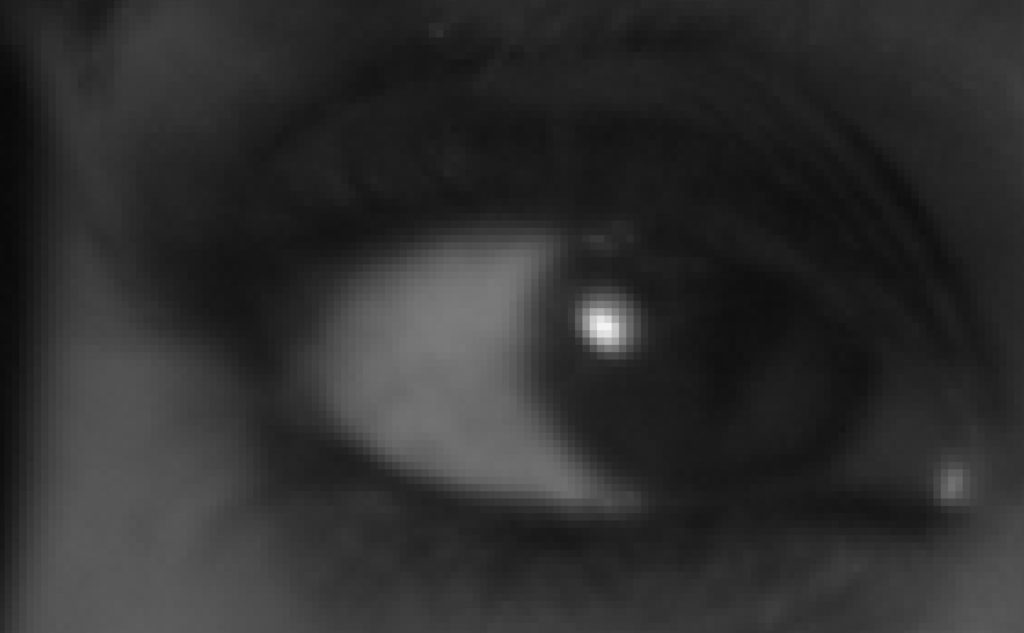
(-roll +1+1) Offset your image by the requisite number of pixels to place a blue pixel at the top left of the image. Assuming RGGB, this is +1+1. If you have BGGR, then this will be +0+0. I recommend trying them both. Heck, you can try +0+1 and +1+0 to see what would typically be the two green pixels. The one that looks the brightest is your correct image.
To test these I ran:
dcraw -c -D -T -6 -g 2.4 12.92 -o 1 DigitalCollodion_D610-1297copy.nef | convert - -roll +0+0 -sample 50% OutputTest_A.tif
dcraw -c -D -T -6 -g 2.4 12.92 -o 1 DigitalCollodion_D610-1297copy.nef | convert - -roll +0+1 -sample 50% OutputTest_B.tif
dcraw -c -D -T -6 -g 2.4 12.92 -o 1 DigitalCollodion_D610-1297copy.nef | convert - -roll +1+0 -sample 50% OutputTest_C.tif
dcraw -c -D -T -6 -g 2.4 12.92 -o 1 DigitalCollodion_D610-1297copy.nef | convert - -roll +1+1 -sample 50% OutputTest_D.tif
Not surprisingly, OutputTest_D matches the blue debayer pixel for my Nikon.
Note this is for a traditional bayer filter. You might wish to review the description of color filter arrays, and see if there is a better fit for you and your sensor. I don’t have the foggiest of how this might be accomplished with an x-Trans color array filter with free command-line tools, unfortunately.
Recreating 1850s Vintage Photography (and IR!) @ Phil Warren Photography
[…] I will later rewrite this script for free interpreters, so that anyone can follow in my footsteps without spending money on expensive coding platforms. A full new article will be posted exploring this. Update: You can find the code, run on freeware, to perform this in my next post. […]
David Bateman
Thank you for this guide. However I have found a better way.
Download the latest version of Libraw and extract the file.
In the Bin folder is a program called 4channels.
In a command prompt run this using the following code:
4channels -A -g image.raw
The -A applies autoscaling, the -g provides 2.2 gamma correction (which is not neccessary).
The program will then output directly your four channel tiff files labelled .raw.b, .raw.r, .raw.g, and .raw.g2
The output is also much cleaner then the dcraw method. Give it a try you might like it better.
Phil Warren
Oooh! Thank you for the feedback, that’s very interesting. I’ll give this a look and see how I like it! I really like the granularity of dcraw, but I’ve been meaning to play around with libraw. I’m a little confused as how it would produce noticeably cleaner results, but I’m absolutely eager to see.